Procedure
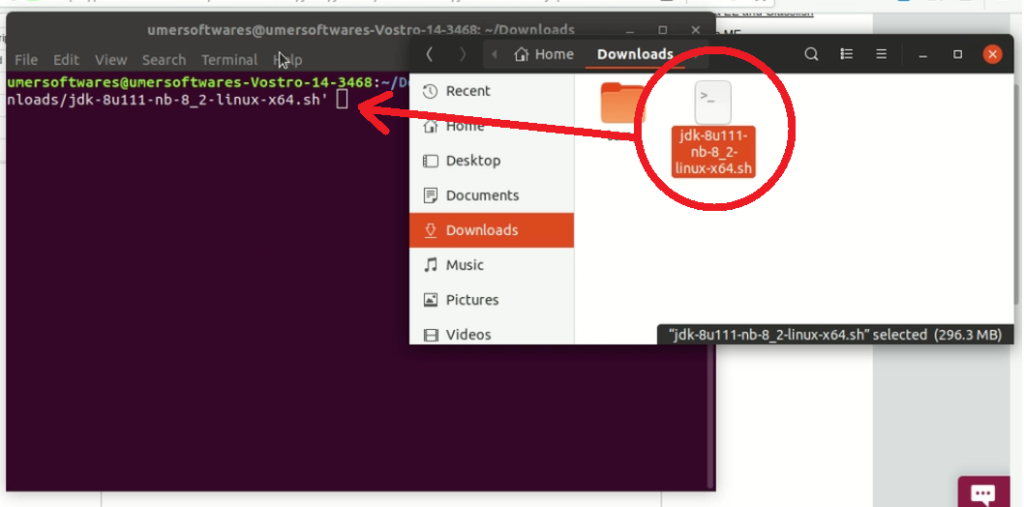
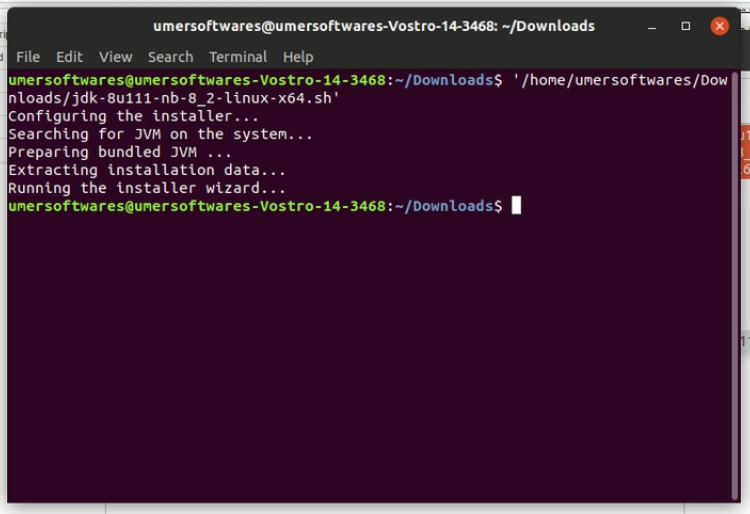
3. Once the file is downloaded, open it in the terminal. To open it in the terminal, open the download folder. Right click and click on “Open in terminal”. Enter the following command (File name might differ in your case)
./jdk-8u111-nb-8_2-linux-x64.sh
Or just open the terminal using the keyboard shortcut Ctrl+Alt+T and drag the installer file into the terminal and press enter.
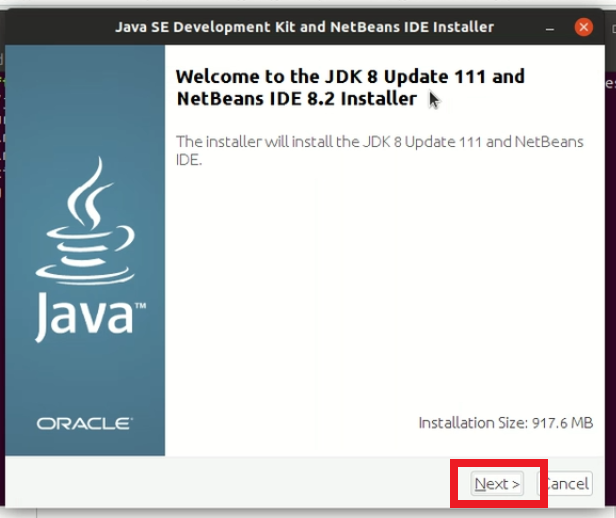
4. The installation process will start. Things will be very simple form now onward. Click Next
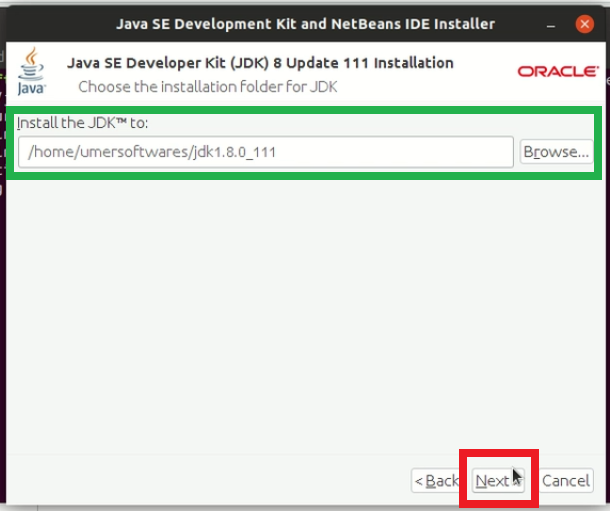
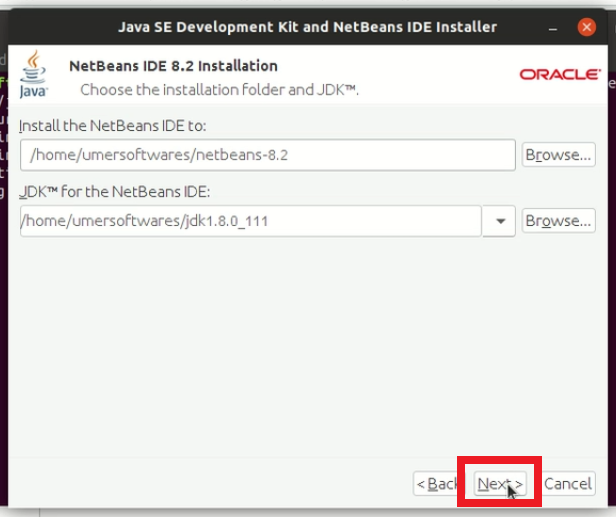
5. Select the path where you want jdk to be installed or keep the default path and click Next
6. Here you can select the path where you want Netbeans to be installed. Make sure to keep the jdk path same as the previous step. Click Next
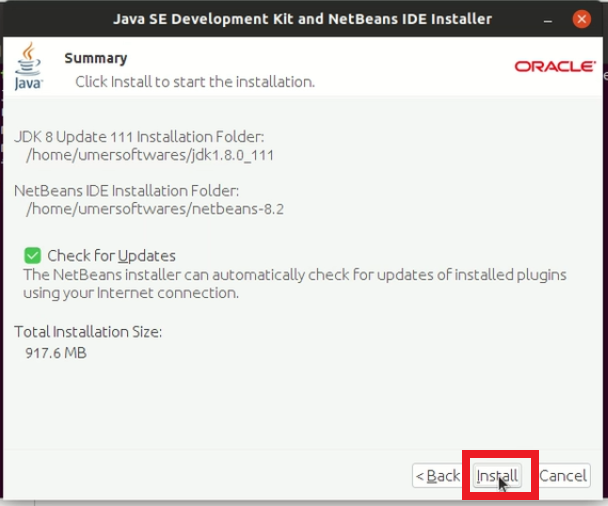
7. Review the settings. Keep the “Check for updates” box checked if you want regular updates and click install.
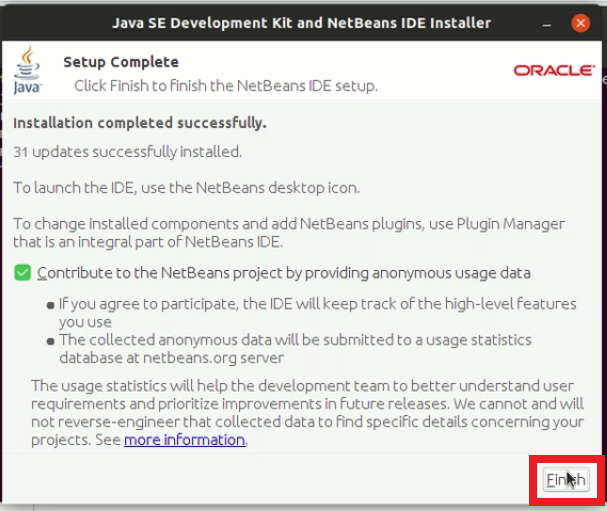
8. After the installation process is complete, click finish.
9. Close the terminal also
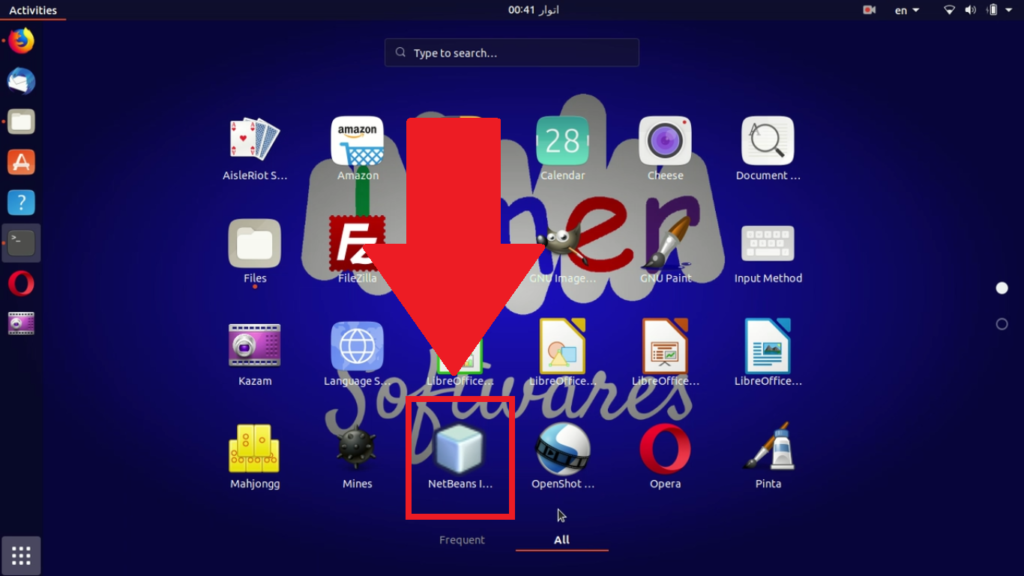
10. You will be able to see Netbeans in the Show Applications menu. You can open Netbeans from there.
Creating your first Java project
In this procedure, you have installed jdk also along with Netbeans so you do not have to install it separately.
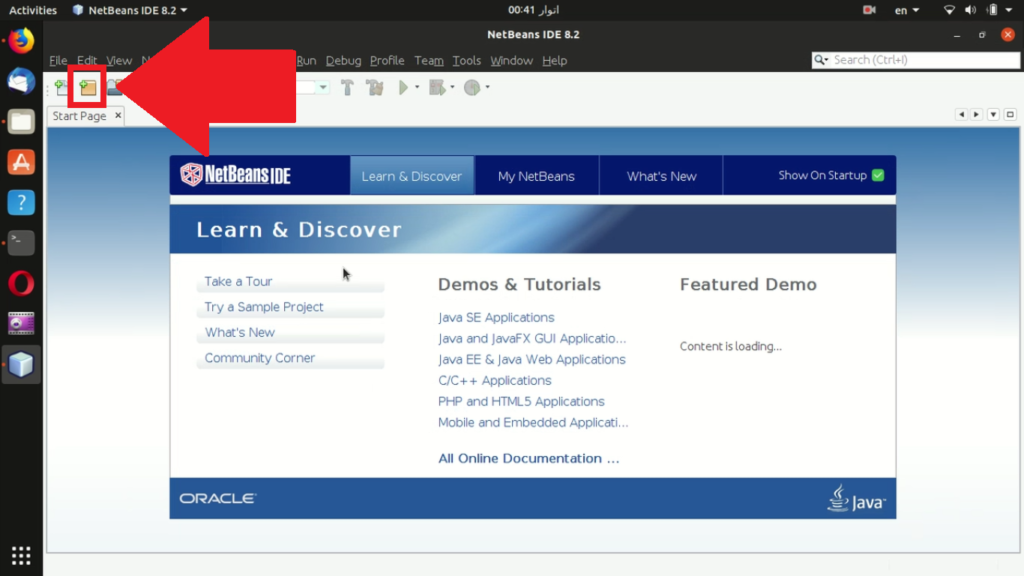
1. After opening Netbeans, click the new project button as shown in the screenshot below.
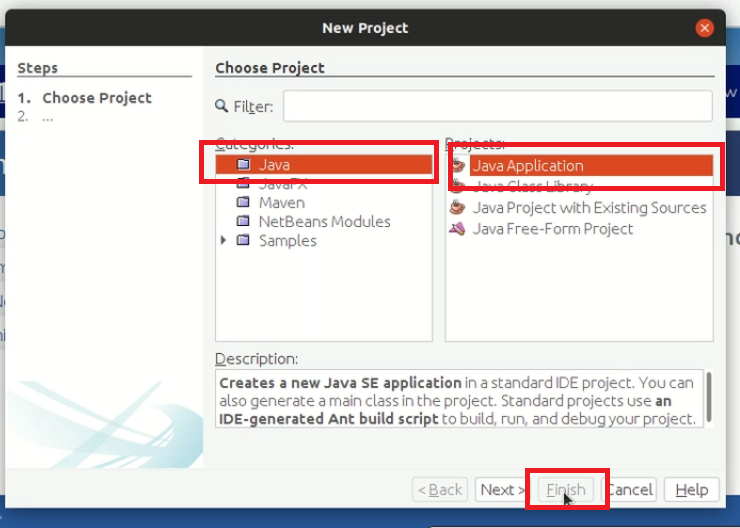
2. Select Java in Categories and Java Application in Projects. Then click “Finish”
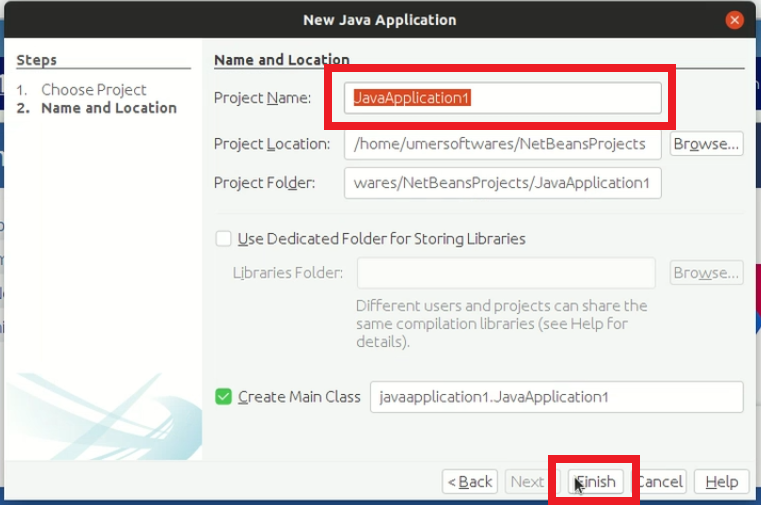
3. Select a name for your project and click Finish
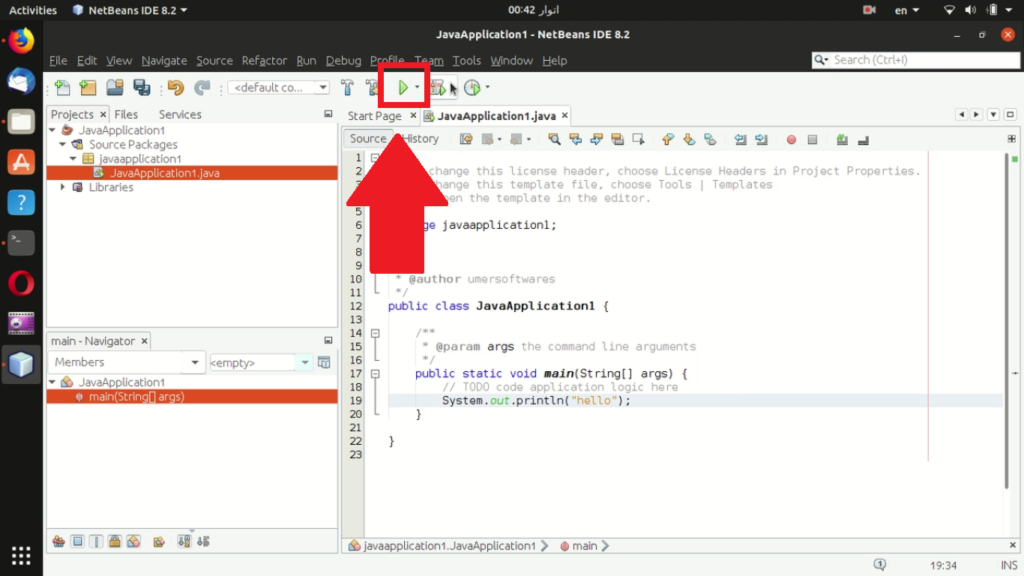
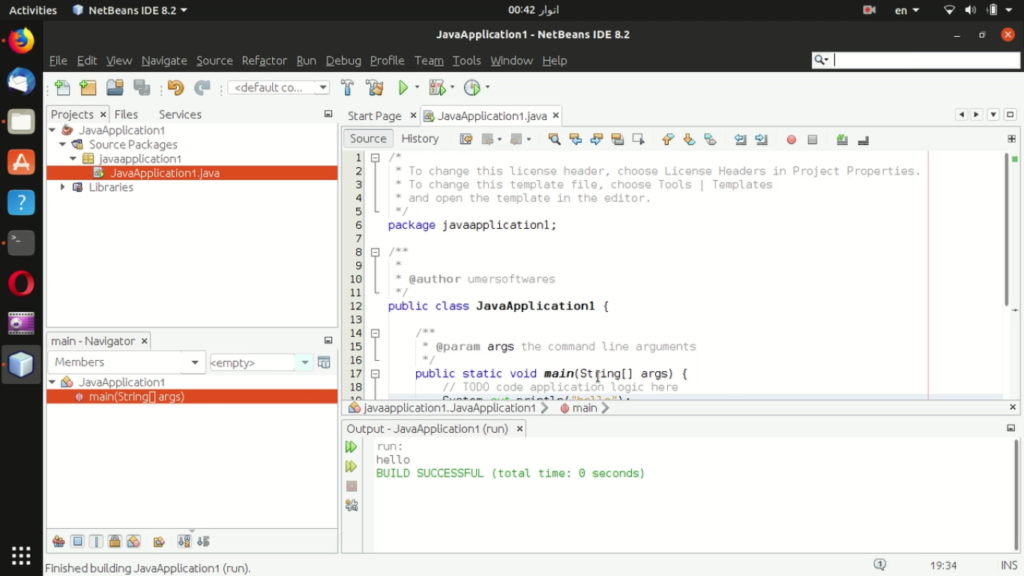
4. Type in your first program and click the run button to test the output.
5. Congratulations! You have installed Netbeans along with java jdk on Ubuntu
Conclusion
In this article, you learnt how to install Netbeans IDE for java programming on Ubuntu Linux. You can see our java course here. If you find the article difficult to follow and need a video on the procedure, we got you covered. Watch the following video on Youtube:
If you still have any confusion, feel free to ask in the comments.
See these also
- Install Netbeans with jdk on Windows
- Learn Java
- Download our Android app to keep yourself updated with the latest content


